Create and Edit Content Page | Knowledge Base

A content page is an informational page, such as an “About Us” or “Contact Us” page. These pages cannot display products. They are created with HTML and Javascript, if needed.
Here are the steps to create a content page using an “About Us” page as the example.
Access Content pages by performing either of the following:
From the Dashboard, click the
 link, OR
From the main menu, select Content>Pages, and then click the Content (#) link.
link, OR
From the main menu, select Content>Pages, and then click the Content (#) link.The Edit Pages window will appear showing the Content pages already created for the site.
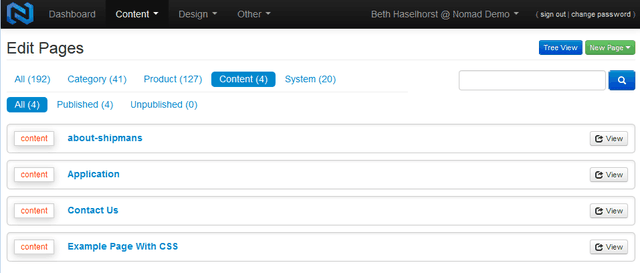
If you want to edit a content page, click on the page name (e.g. Contact Us). NOTE: to find a Content Page, you can type any portion of the name into the search field in the top right. Press Enter after typing.
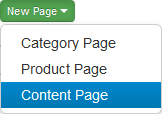
If you want to create a new content page, click the New Page drop-down menu in the upper right corner and select Content Page from the menu.
The Edit Content Page window appears with the Page tab selected. Fields with an asterisk are required.

In the Name for the Content Page. For example:

In the Path field, enter the url path for the Content Page. This is the path for the webpage that will display in the browser. The path is typically a forward slash (/) and the name with no spaces. For example:

You do not need to enter anything into the External ID field.
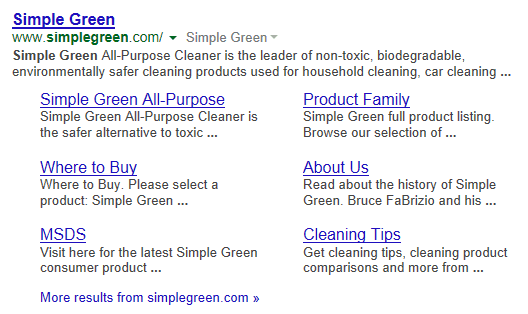
The Meta Title and Meta Description fields are used for SEO (Search Engine Optimization). The information typed into the fields displays when the company appears in Google search results. For example:

Here is an example of the "About Us" title link and text that appears when searching for "Simple Green" in Google:
In the Parent Page section, select where you want to nest this page. For example, if you want the page to be accessible from the home page, select Home from the drop-down menu.
![parentpageexample.png]/assets/site/img/KB/pages/parentpageexample_normal.png)
NOTE: There are additional steps that you will need to take to create a link to this content page from the nested page. See the "Create a Link to a Content Page" topic later in this guide.
If you would like to add a meta image to this page, click the
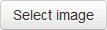 button and then navigate to the image on your computer. For example:
NOTE: a meta image provides SEO advantages. For example, the image may appear during Google search results.
Select the appropriate checkboxes at the bottom of the window. Below is a description of each option:
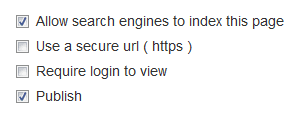
NOTE:
 These icons appear on the "Edit Pages" screen that indicate your checkbox selections. For example: a grayed out "lock" button indicates that "Use a secure url" is not selected.
 Allow search engines to index this page: Do you want search engines to be able to find this page? If so, check this box. This option is checked by default.
 Use a secure url (https): If this page contains personal information, you may want to check this box.
 Require login to view: If you want to require a login to view this page (i.e., a customer with a customer account), check this box.
 Publish: With this box checked, the page will be published when you click the Save button. If you want to preview the page before publishing, uncheck this box. When ready to publish, you can check the box again.
Click the Content tab at the top of the window. This window appears:
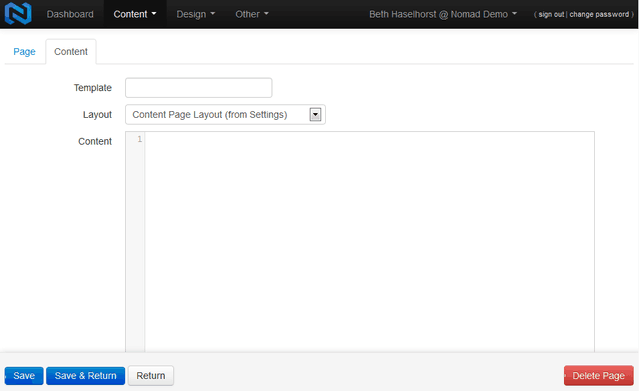
In the Template field, you can reference a separate CSS file if needed. This field is typically not used.
In the Layout field, select the layout to use for the page. The default layout of the "Content Page Layout (from Settings)" inherits the layout from general settings.
In the Content type the HTML script to display your desired content for the page. For example, to display text on the page, the html code might look like this:
<p> We are a nationally-recognized retail bike shop. We specialize in mountain, road and touring bikes. <p>If you want to use a javascript function, you can enter the code into the Javascript field.
To save the page, click the Save button at the bottom of the window.
NOTE: If the “Publish” checkbox is selected under the “Page” tab, clicking Save will publish the page to the website.
The Save & Return button saves the page and takes you back to where you were within the past 60 seconds.
the
 icon button will appear in the upper right corner after the page is saved. Click the button for a preview of the webpage.
 When viewing a webpage, an
 button will appear in the upper right corner. Click the button to edit the page in NOPS.
